官方文档:https://docs.langchain.com/langsmith/local-server#python-server-2
langchain给我们提供了Studio+ LangSmith集成的测试环境,使用studio在本地可视化、交互和调试Agent。
Studio是一个专门的Agent IDE,支持对实现智能体服务器API协议的代理系统进行可视化、交互和调试,还集成了跟踪、评估和提示工程。
# 1、安装LangGraph CLI
pip install -U "langgraph-cli[inmem]"# 2、创建一个langgraph应用
langgraph new ./app1 --template new-langgraph-project-python# 3、项目目录层级结构
app1/
├── .codespellignore
├── .env.example
├── .gitignore
├── .github/
│   └── workflows/
│       ├── integration-tests.yml
│       └── unit-tests.yml
├── langgraph.json
├── LICENSE
├── Makefile
├── pyproject.toml
├── README.md
├── src/
│   └── agent/
│       ├── __init__.py
│       └── graph.py
├── static/
│   └── studio_ui.png
└── tests/
    ├── conftest.py
    ├── integration_tests/
    │   ├── __init__.py
    │   └── test_graph.py
    └── unit_tests/
        ├── __init__.py
        └── test_configuration.py
#
# 4、安装依赖
cd path/to/your/app
pip install -e .
# 5、获取langsmith密钥
https://smith.langchain.com/o/73156ad8-9fe7-4ab2-ace7-5c5bbfe58d1f/settings/apikeys获取APIKEY
# 6、创建.env配置文件填入langsmith的apikey
LANGSMITH_API_KEY="lsv2_pt_57529679eafee000f7_bcb2664fc4" # 错误的# 7、启动agent
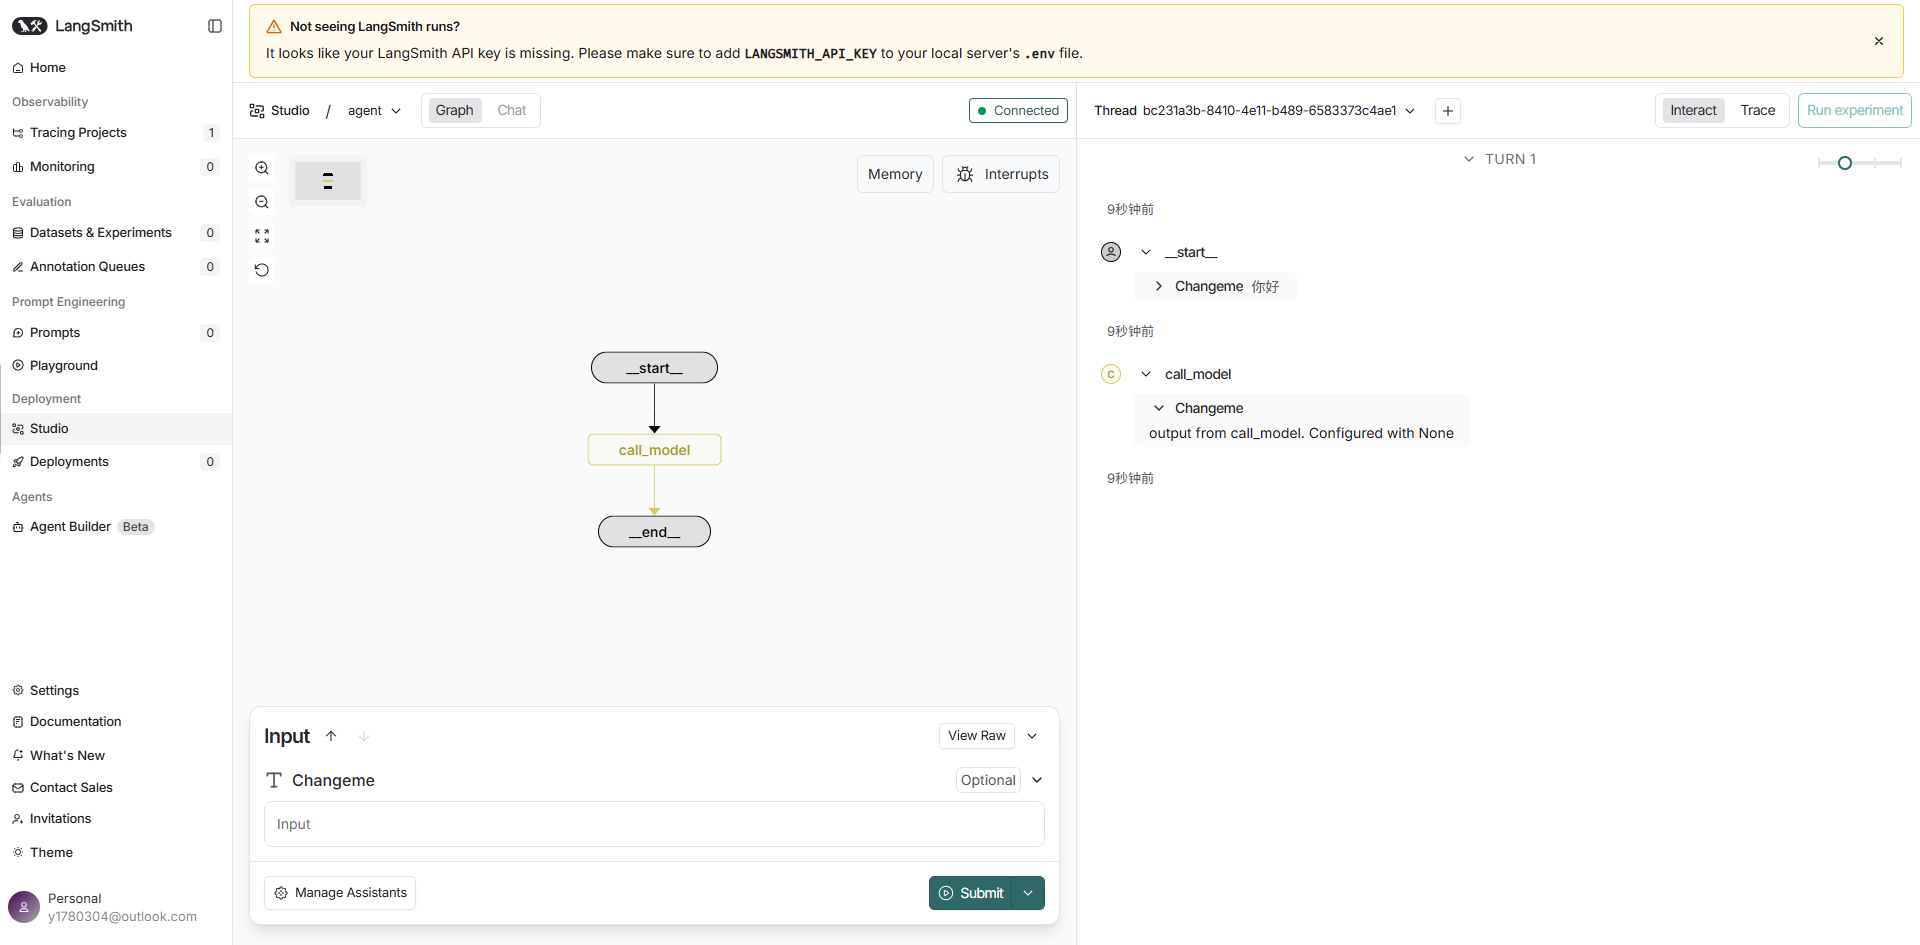
langgraph dev就会弹出网页可视化执行了
# 如果不使用langgraph创建应用,还想使用他的可视化、交互和调试,还集成了跟踪、评估和提示工程等功能,可以
# 创建LangGraph配置文件
在应用程序的目录里创建一个配置文件:langgraph.json
# langgraph配置文件
{
    "dependencies": ["."],
    "graphs": {
        "agent": "./src/agent.py:agent"  --根据智能体在哪去配置,前面是文件名,后面是智能体变量名
    },
    "env": ".env"
}
# 写智能体
from langchain.agents import create_agent
from pydantic import BaseModel, Field
from langchain_openai import ChatOpenAI
from dotenv import load_dotenv
import os
load_dotenv('../.env')
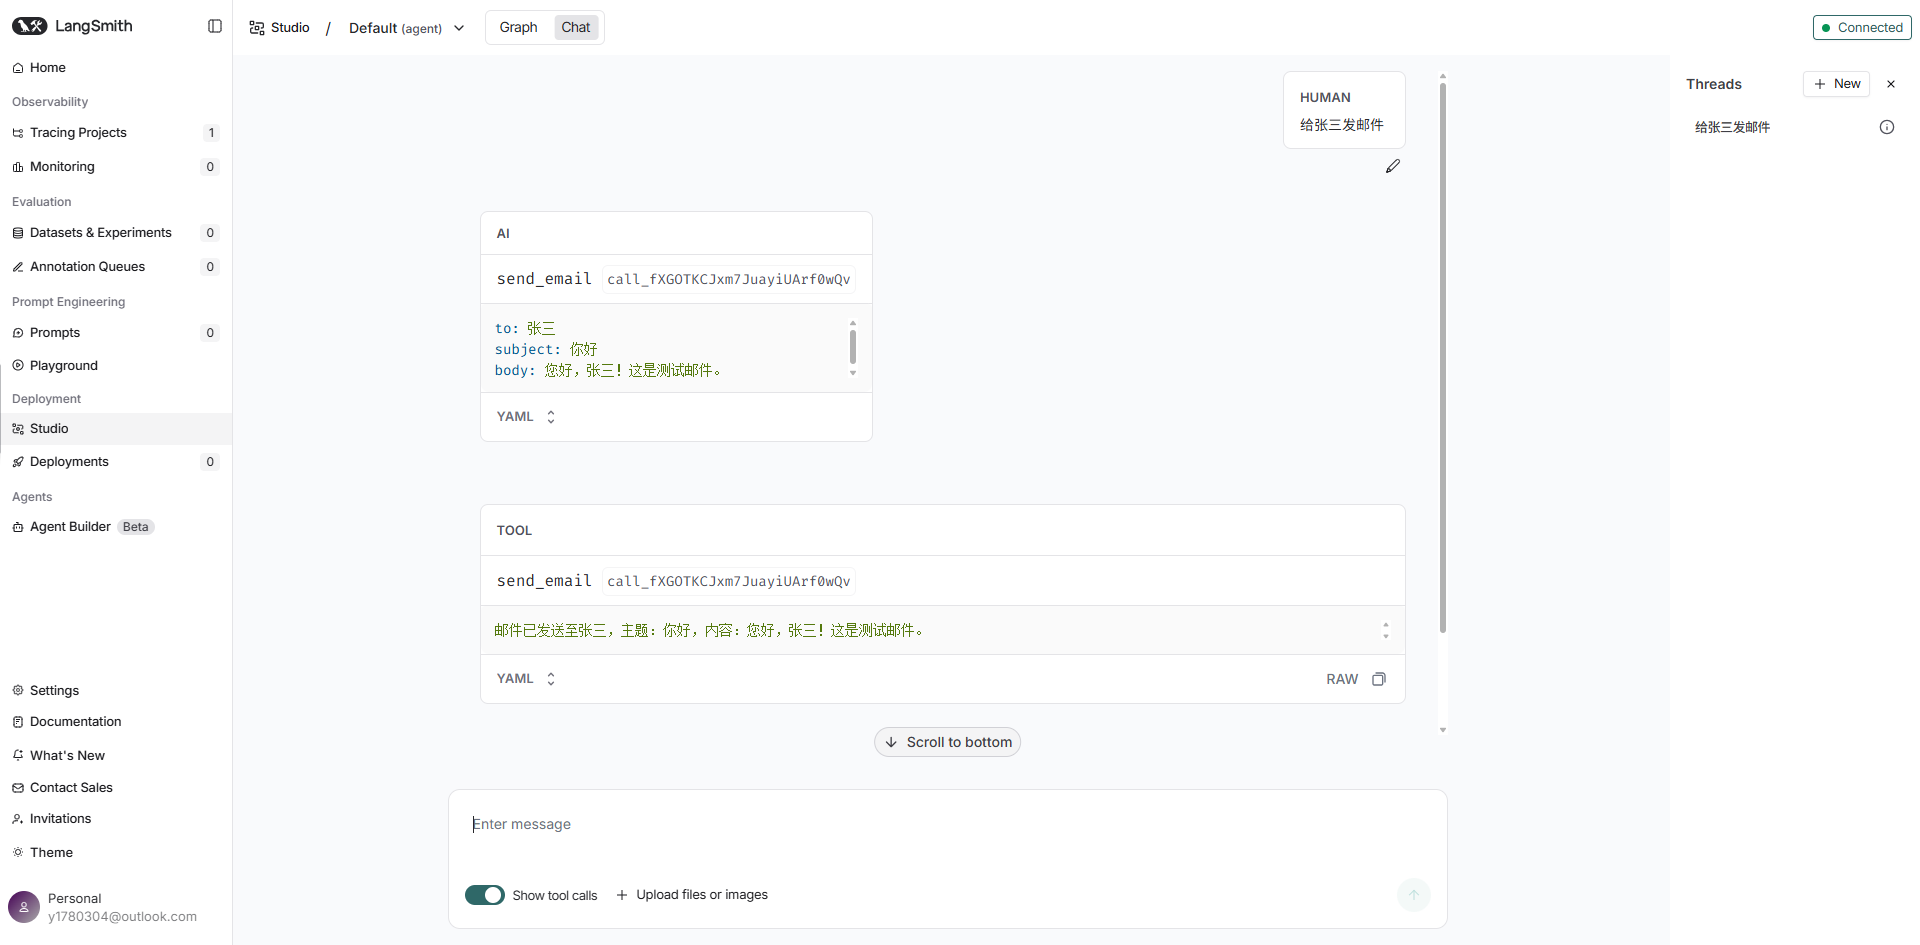
def send_email(to: str, subject: str, body: str):
'''模拟发送邮件的功能'''
# 这里可以换成实际的邮件发送逻辑,例如使用smtplib
return f'邮件已发送至{to},主题:{subject},内容:{body}'
llm = ChatOpenAI(
base_url=os.getenv('OPENAI_BASE_URL'),
api_key=os.getenv('OPENAI_API_KEY'),
model=os.getenv('OPENAI_MODEL'),
)
# 创建agent时传入工具
agent = create_agent(
model=llm,
tools=[send_email],
system_prompt="你是一个邮件助手,可以使用`send_email`工具发送邮件"
)复制粘贴 pyproject.toml文件 然后安装依赖...参考上述步骤
[project]
name = "agent"
version = "0.0.1"
description = "Starter template for making a new agent LangGraph."
authors = [
    { name = "William Fu-Hinthorn", email = "[email protected]" },
]
readme = "README.md"
license = { text = "MIT" }
requires-python = ">=3.10"
dependencies = [
    "langgraph>=1.0.0",
    "python-dotenv>=1.0.1",
]


[project.optional-dependencies]
dev = ["mypy>=1.11.1", "ruff>=0.6.1"]

[build-system]
requires = ["setuptools>=73.0.0", "wheel"]
build-backend = "setuptools.build_meta"

[tool.setuptools]
packages = ["langgraph.templates.agent", "agent"]
[tool.setuptools.package-dir]
"langgraph.templates.agent" = "src"  --注意路径
"agent" = "src"  --注意路径


[tool.setuptools.package-data]
"*" = ["py.typed"]

[tool.ruff]
lint.select = [
    "E",    # pycodestyle
    "F",    # pyflakes
    "I",    # isort
    "D",    # pydocstyle
    "D401", # First line should be in imperative mood
    "T201",
    "UP",
]
lint.ignore = [
    "UP006",
    "UP007",
    # We actually do want to import from typing_extensions
    "UP035",
    # Relax the convention by _not_ requiring documentation for every function parameter.
    "D417",
    "E501",
]
[tool.ruff.lint.per-file-ignores]
"tests/*" = ["D", "UP"]
[tool.ruff.lint.pydocstyle]
convention = "google"

[dependency-groups]
dev = [
    "anyio>=4.7.0",
    "langgraph-cli[inmem]>=0.4.7",
    "mypy>=1.13.0",
    "pytest>=8.3.5",
    "ruff>=0.8.2",
]